You can transfer Associate in Nursing ISO and avoid upgrading from Windows ten
Many people square measure moving their PCs to Windows 11 by upgrading Associate in Nursing existing install of Windows 10. However, so as to try and do that, you want to have Associate in Nursing activated copy of Windows ten with its own product key on the pc within the 1st place. however, what if you simply need to throw Windows eleven onto Associate in Nursing recent or experimental laptop, while not having to put in Associate in Nursing activated copy of the previous software system first?
Using tools from a website known as UUP dump, you’ll be able to transfer Associate in Nursing ISO file of the most recent Windows 11 build and use that to either produce a bootable install USB Flash drive or install Windows 11 directly in an exceedingly virtual machine. you’ll be able to even depart with skipping the merchandise key thus you’ll be able to run the new software system fully without charge (at least for now).
Note that this methodology may additionally enable you to put in Windows eleven on PCs that do not meet the new in operation system’s minimum necessities (4GB of RAM, TPM, Secure Boot). In testing, we have a tendency to use this install methodology on 2 completely different virtual machines, each of that had simply 2GB of RAM, no TPM and no Secure Boot. we have a tendency to didn’t get any warnings and therefore the install worked while not issue. we have a tendency to didn’t have a physical laptop that did not meet necessities to check with.
How to Clean Install Windows 11
1. Navigate to uupdump.net.
2. Click the foremost recent version of Windows 11 insider executive Preview for amd64 (even if you have got Associate in Nursing Intel chip). The arm64 version is for non-x86 computers and might be accustomed install Windows 11 on a Raspberry Pi.
3. Click Next.
4. choose the Windows edition you wish. and click on Next. we have a tendency to selected Windows Home.
5. choose “Download and convert to ISO” and check “Include updates” so click “Create transfer package.” a tiny zip file will download to your laptop.
6. unfasten the file and place its contents in an exceedingly dedicated folder.
7. Double-click uup_download_windows.cmd within the folder with the downloaded files.
8. Click “Run Anyway,” if Windows ten warns you that this is often Associate in Nursing unrecognized app.
A prompt window can open, running a batch file that downloads all the mandatory files from Microsoft and creates the ISO file for you. This method can take many minutes or maybe longer, betting on your net association.
9. Press 0 to exit once the script completes the transfer.
An .ISO file can seem within the folder wherever you placed uup_download_windows.cmd.
Making a Bootable Windows eleven Install Disk
Unless you are simply putting in Windows eleven onto a virtual machine, during which case you’ll be able to skip to step nineteen, you may have to be compelled to produce a bootable Windows eleven install disk. For that, you will need Associate in Nursing empty USB Flash drive that is a minimum of 8GB.
One issue that creates this method difficult is that, if you utilize a well-liked Flash drive “burning” program like Rufus, it’ll produce Associate in Nursing NTFS-formatted boot drive, as a result of the most installation file is quite 4GB and thus cannot carry on a FAT32 partition. the matter with Associate in Nursing NTFS drive is that you’d need to disable Secure Boot (in your BIOS) so as else from it and Windows eleven needs Secure Boot therefore the installer might tell you that you are not meeting the wants.
To solve this downside and build a USB Flash drive that may each hold your files and boot on a Secure Boot-enabled laptop, follow these steps.
10. Connect your USB Flash drive. Please note that you simply are erasing all the info thereon.
11. Open the Disk Management app. you’ll be able to realize it by checking out “partitions” and clicking the highest result.
12. Delete all partitions on your USB drive by right clicking on every and choosing “Delete Volume.
13. produce a replacement, 1GB partition and format it as FAT32. You initiate this method by right clicking on the unallocated house and choosing New easy Volume. you’ll be able to name it something you wish. this can be the partition that contains the files you would like for booting.
14. produce a second partition and format it as NTFS. It ought to take all the remaining disc space.
15. Mount the ISO file by right clicking it and choosing Mount. this can enable you to browse the ISO as if it were a physical disk and duplicate files from it.
16. Copy all the files and folders, except the “sources” folder, to the FAT32 partition on the USB drive.
17. produce Associate in Nursing empty folder known as “sources” on the USB drive’s FAT32 partition and duplicate solely the boot. Wim file into it from the initial “sources” folder.
18. Copy all the files and folders from the ISO, as well as those you derived before, onto the NTFS partition of the USB drive.
You should currently have a USB Flash drive that may boot on a pc that has Secure Boot enabled.
Installing Windows eleven on the Target laptop
19. Boot your target laptop off of the USB installation drive. you will have to be compelled to hit a key or re-arrange the boot order else from USB.
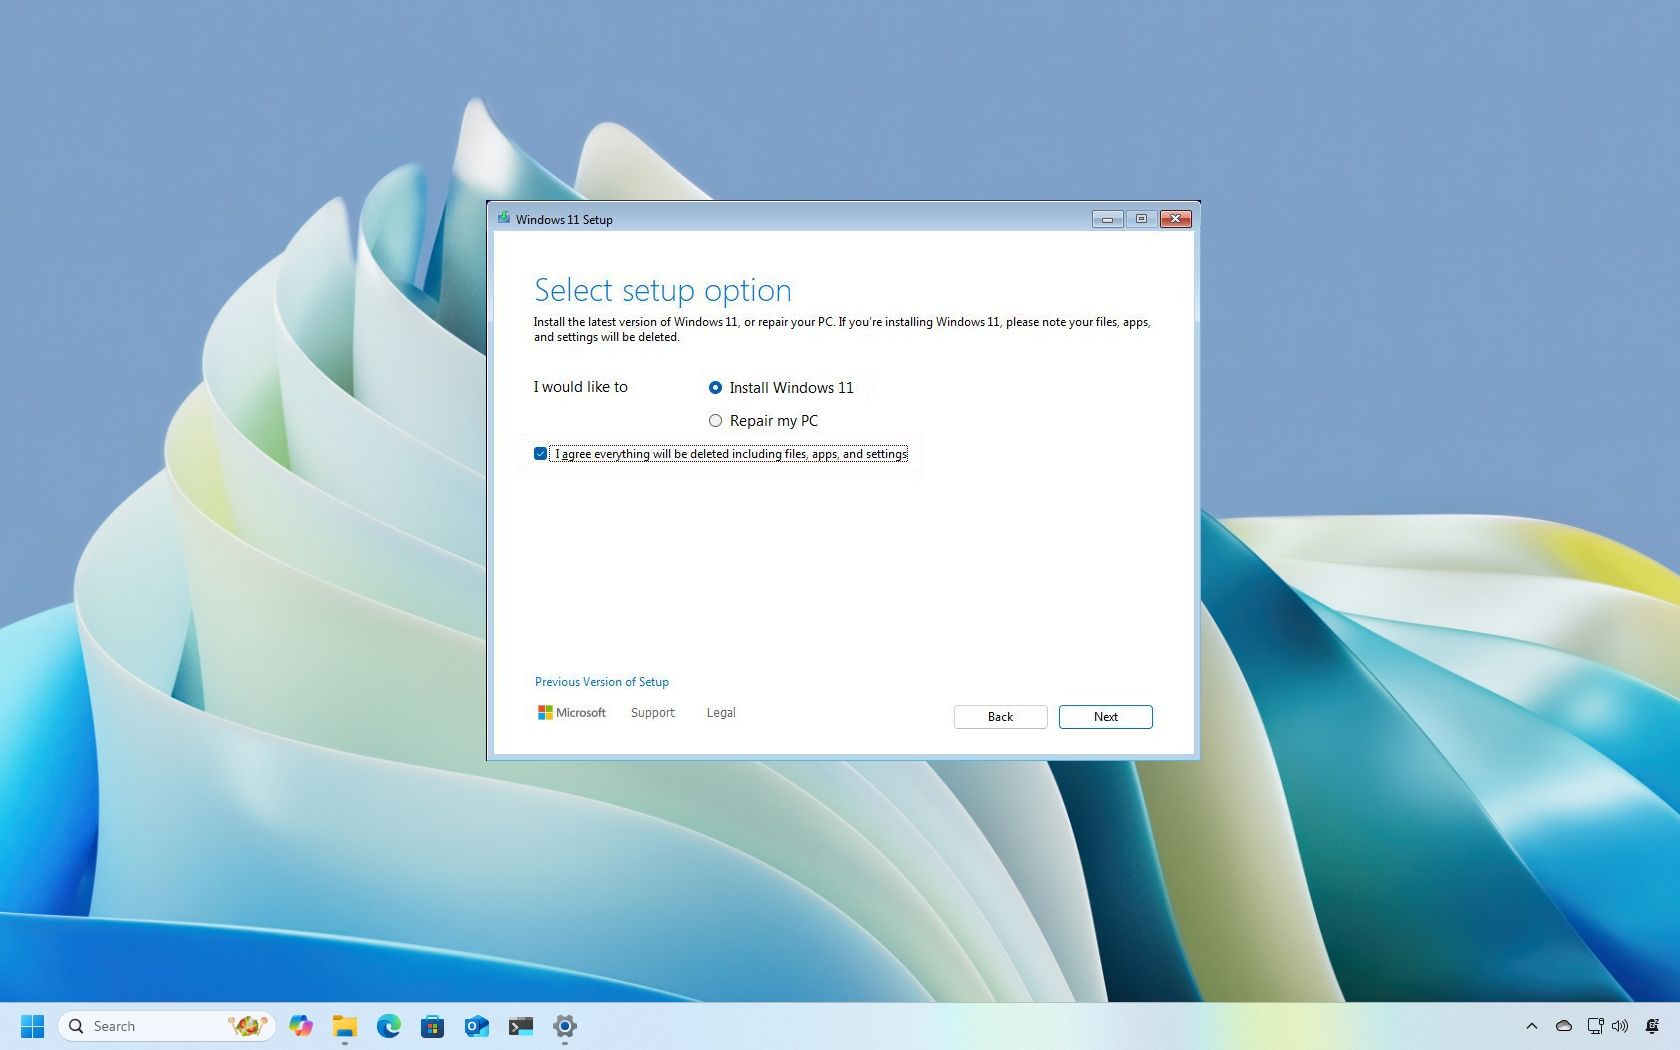
20. choose your language (if it isn’t already selected) and click on Next.
21. Enter a legitimate product key or click “I do not have a product key.” Then click Next.
22. settle for the license agreement and click on Next.
23. choose Custom Install.
24. opt for the installation drive and click on Next.
The installer can copy some files and will boot at this time.
25. choose your country or region (if it isn’t selected) and click on affirmative. Also, choose your keyboard layout once prompted.
26. Name your laptop and click on Next.
27. register together with your Microsoft account.
28. produce a PIN for fast logins.
29. Click “Set up as new device” (or you’ll be able to restore a previous config).
30. change or disable privacy settings and click on Next.
31. Select your interests to help customize Windows 11’s recommendations or, better yet, click Skip.
32. Set up OneDrive or select Only store files on this device.
Windows will now take a few minutes to complete the install process.
When it’s done, you should see the Windows 11 desktop. Now you can play around with Windows 11 or tweak some settings. For example, you can move the Windows 11 taskbar to the top or get back the old Windows 10 File Explorer in Windows 11.